Install TWRP and Root Flipkart Billion Capture Plus: Now that you have purchased Flipkart billion capture plus, its time to root it and flash custom recovery TWRP. In this article, I present you a guide on how to install twrp and root flipkart billion capture plus.
Note: This method of installing TWRP and Rooting works on both Billion Capture and Billion Capture Plus.
Table of Contents
Install TWRP and Root Flipkart Billion Capture Plus
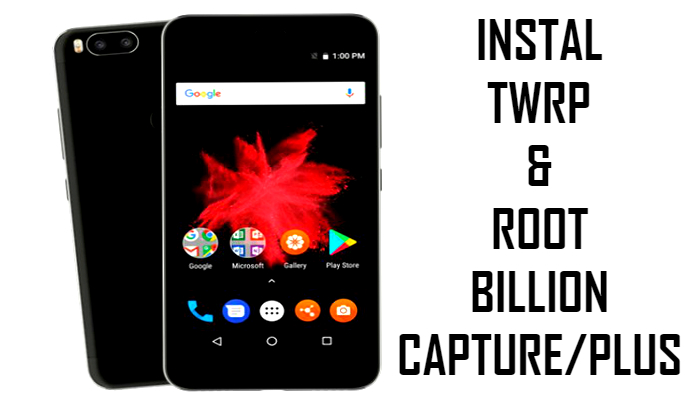
Installing TWRP in Billion Capture is really an easy task. It will not take much of your time to flash a custom recovery TWRP on this phone. You just have to follow all the instructions very carefully.
Requirements for installing TWRP and Rooting Billion Capture Plus
- Unlock Bootloader: This step is very important. Without unlocking the bootloader, you may not be able to install twrp and root your android smartphone.
Disclaimer: If you try to flash twrp without unlocking the bootloader then you may end up bricking your phone. - Windows Computer: Yes, a computer is mandatory to install twrp. There are many tutorials in which they showed how to install twrp without a computer. But in real life, they do not work. Hence, it is mandatory to have a desktop or laptop of Windows.
- This method is dedicated to flipkart billion capture and billion capture plus. If you use this tutorial on any other smartphones then you may brick your smartphone.
- Use Original Cable: I always recommend to use original cable while performing flashing tasks. Duplicate cables may not pass the data very effectively. And any damage to the cable will result in bricking of Smartphone.
Also Check: Greenify Donation APK and Mobile Uncle Tools APK
Steps to Install TWRP on Flipkart Billion Capture Plus
- The very first step is to go to Settings on your phone. And go to about phone. Click on Build Number for 7 times. This will enable the developers’ option.
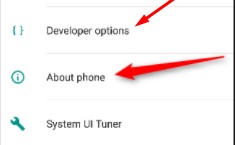
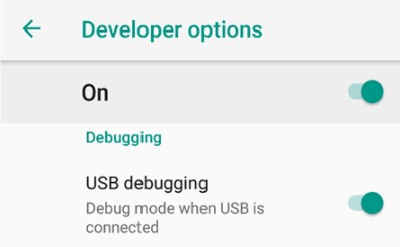
- Go to developers option(Just above About Phone) and enable OEM unlocking and USB Debugging.
- On your computer, download USB drivers from the downloads area.
- Turn off your billion capture and boot into the fastboot mode.
- Connect your billion capture(Fastboot mode) to the computer.
Also Check: SN Write Tool - Download TWRP for Billion Capture Plus from the downloads section.
- Create a new folder and copy the TWRP file into that folder.
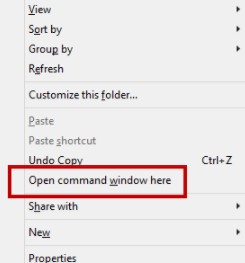
- Open that folder. Press Shift and Right Click on your mouse. Select Open Command Window Here.
- To check if the device is connected properly, type “Fastboot adb device“(Without inverted commas). This will show the list of devices which is connected to the computer.
- Now type “Fastboot flash recovery twrp.img”
- The flashing will be done in two or three seconds.
- Congratulations for successfully installing the custom recovery TWRP on your Flipkart Billion Capture.
How To Root Flipkart Billion Capture Plus

- Download the SuperSu Zip file and save it on your smartphone.
- Boot your Flipkart billion capture in the recovery mode.
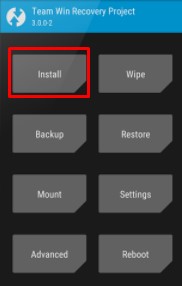
- Tap on install and select the SuperSu Zip File and flash it.
- After you have successfully flashed the SuperSu, reboot your smartphone.
- Download Root Checker App from the play store and check the root access.
- It will show the flipkart billion capture is successfully rooted.

- Congratulations for rooting flipkart billion capture.
Also Check: How to root Samsung S9
Downloads:
If this method does not work on your billion capture phone then you should use some best alternatives like 360 root apk, iroot apk, framaroot apk v1.93, and towelroot apk.
Final Verdict on Rooting and flashing TWRP in Flipkart Billion Capture
This was the simple guide on how to root and install twrp on flipkart billion capture plus. I hope this guide has helped you in rooting and flashing your phone. If you have any doubts then let me know in the comments below. I will help you with the best possible solutions.
Kaushik Choudhury says
In Download section USB Driver is pointing to another article but not the TWRP software location.